
Soothe and Relax: Using Nail Massage Lotion for Stress-Free Nail Care
Introduction
Imagine a world where every time you looked down at your hands, you were met with a perfect set of nails. Nails that were strong, healthy, and beautiful. It may sound too good to be true, but with the help of nail massage lotion, it’s possible.
Nail massage lotion is a powerful tool in the quest for healthy and gorgeous nails, providing nourishment, hydration, and relaxation to both the nails and the surrounding cuticles. Wonder what it is and how it can help you? You’ve come to the right place!
From essential oils to nourishing vitamins, we will provide every basic facts of how nail massage lotion can provide the perfect finishing touch to your nail care routine. So sit back, relax, and prepare to enter a world of beautiful nails with the help of Amoca Nails and Beauty Supply.
Benefits of Using Nail Massage Lotion
Nail massage lotion is a powerful tool in the quest for healthy, beautiful nails. Here are some of the benefits of using nail massage lotion:
 Nourishes the Nail and Cuticle
Nail massage lotion is specifically formulated to provide the nourishment and hydration that your nails and cuticles need. It contains ingredients such as oils, vitamins, and minerals that penetrate deep into the nail bed and cuticle, providing moisture and nourishment where it’s needed most. This can help prevent dryness, brittleness, and breakage, leaving your nails looking and feeling healthy and strong.
Promotes Healthy Nail Growth
Using nail massage lotion regularly can help promote healthy nail growth. The nourishing ingredients in the lotion can help strengthen the nail bed, making it less prone to breakage and damage. This can lead to longer, stronger, and healthier nails over time.
Provides Relaxation and Stress Relief
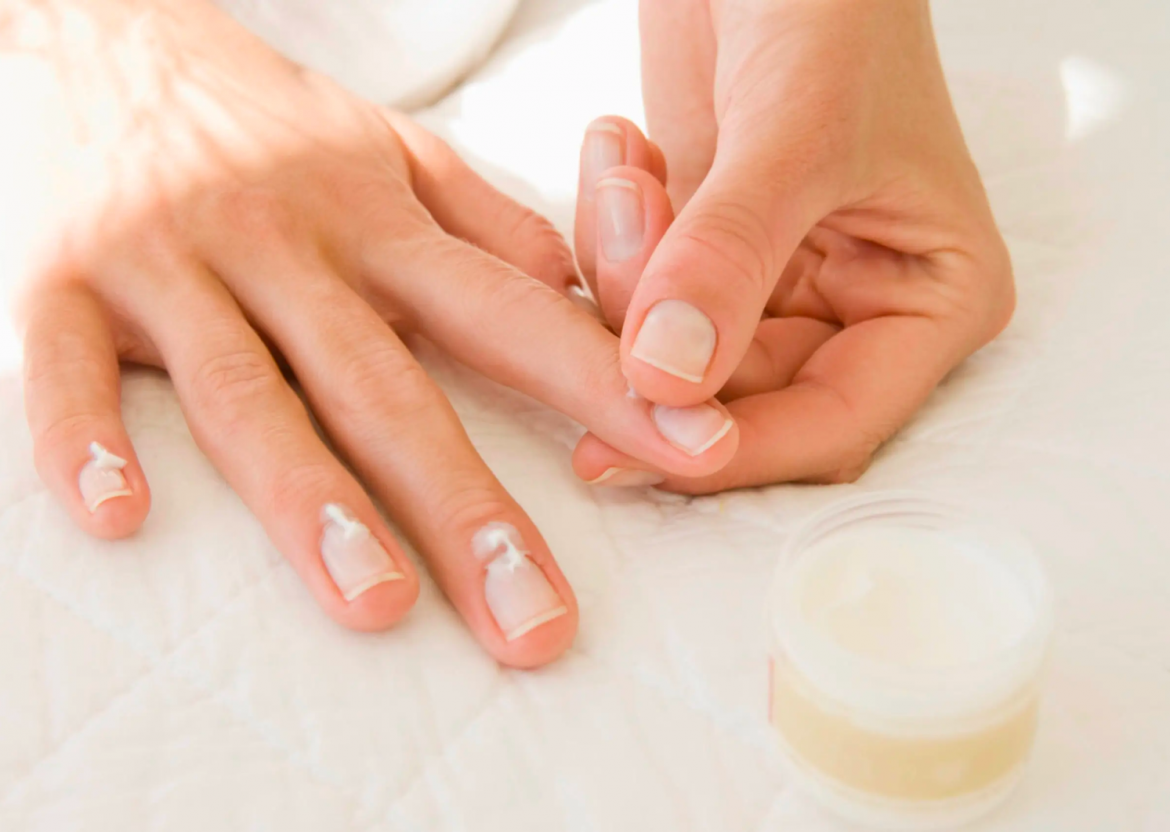
Nail massage lotion isn’t just good for your nails, it’s also good for your mind and body. The act of massaging the lotion into your nails and cuticles can be incredibly relaxing and soothing, helping to relieve stress and tension in the body. This can have a positive impact on your overall well-being and help you feel more relaxed and centred.
Enhances the Overall Nail Care Experience
Using nail massage lotion can help enhance your overall nail care experience. It provides an extra layer of care and attention to your nails and cuticles, helping to keep them looking and feeling their best. It can also be a luxurious and indulgent self-care ritual that leaves you feeling pampered and refreshed.
How to Choose the Right Nail Massage Lotion
Choosing the right nail massage lotion is a crucial part of achieving healthy, beautiful nails and cuticles. With so many options available on the market, it can be overwhelming to choose the right one.
However, by considering your nail and cuticle type, personal preferences, and the ingredients in the lotion, you can make an informed decision that will provide the most benefits for your unique needs.
 Nail and cuticle type
One of the most important factors to consider when choosing a nail massage lotion is your nail and cuticle type. If you have dry, brittle nails or cuticles, you may want to choose a lotion that’s rich in oils and moisturizers, such as almond oil, jojoba oil, or shea butter. These ingredients help to hydrate and nourish the skin, leaving your nails and cuticles feeling soft and supple.
On the other hand, if you have oily nails or cuticles, you may prefer a lighter lotion that absorbs quickly and doesn’t leave a greasy residue. Look for lotions that contain ingredients such as tea tree oil, which has natural antiseptic properties that can help to keep nails and cuticles healthy and clean.
Personal preference
Personal preference is another key factor to consider when selecting a nail massage lotion. You may prefer a lotion with a certain scent or texture, or you may have a particular brand that you trust and prefer. It’s important to choose a lotion that you enjoy using, as this will encourage you to use it regularly and reap the benefits.
Ingredients
The ingredients in a nail massage lotion are also crucial to its effectiveness. Look for lotions that contain nourishing oils, vitamins, and minerals that promote healthy nail growth and hydration. Avoid lotions that contain harsh chemicals or fragrances that can dry out or irritate the skin. If you have sensitive skin or allergies, be sure to check the ingredients list carefully and choose a lotion that’s free from potential irritants.
Tips for Using Nail Massage Lotion
Once you’ve chosen the right nail massage lotion, it’s important to use it correctly to maximize its benefits. Here are some tips to help you get the most out of your nail massage lotion:
- Use the right amount: It’s important to use the right amount of lotion for optimal results. Too little lotion may not provide enough hydration, while too much can leave a greasy residue. A good rule of thumb is to use a pea-sized amount of lotion for each hand, or more if you have particularly dry nails or cuticles.
- Massage in the direction of the nail growth: When applying the lotion, be sure to massage it in the direction of the nail growth. This helps to stimulate blood flow to the nail bed, promoting healthy nail growth and nourishing the cuticles.

- Use consistently for best results: Consistency is key when it comes to using nail massage lotion. For best results, use the lotion regularly, ideally after washing your hands or taking a shower when your skin is most receptive to hydration. You may also want to consider incorporating it into your bedtime routine for a relaxing and hydrating experience.
- Store the lotion properly: To ensure that your nail massage lotion stays fresh and effective, be sure to store it properly. Keep it in a cool, dry place, away from direct sunlight and heat, which can cause the ingredients to break down and lose their potency.
Conclusion
In conclusion, using a nail massage lotion can be a great addition to your nail care routine. Not only does it provide hydration and nourishment for your nails and cuticles, but it also promotes healthy nail growth and can be a relaxing and stress-relieving experience.
By choosing the right lotion for your needs, using it consistently and correctly, and storing it properly, you can maximize the benefits of this simple but effective product. With regular use, you can achieve healthy, beautiful nails and cuticles that you’ll be proud to show off.
Nail Care Made Easy: How to Use Nail Files and Buffers Like a Pro
Introduction
Your hands are an extension of your personality, and just like any accessory, your nails should make a statement. However, achieving that perfect set of nails requires more than just a fresh coat of polish.
The secret lies in the art of nail care, and at the center of that art are nail files and buffers. These unassuming tools may seem simple, but they hold the power to transform your nails from drab to fab.
So, whether you’re looking to fix a broken nail or just seeking that perfect shape, join with Amoca Nails Australia on a journey through the world of nail files and buffers.
Get ready to discover everything you need to know to achieve healthy, stunning nails that will leave a lasting impression.
Types of Nail Files

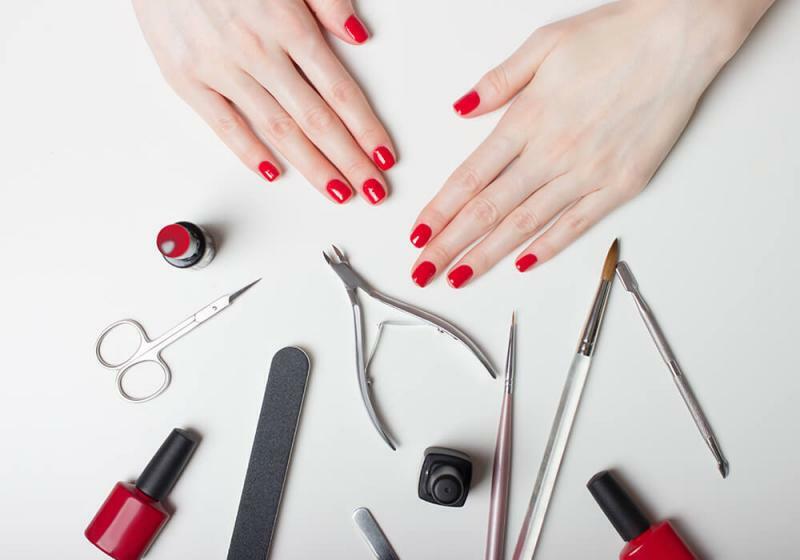
When it comes to nail files, there are several different types to choose from, each with its own unique advantages. Here are some of the most common types of nail files:
- Emery Boards: These are the most common type of nail file and are typically made of cardboard with a layer of emery (a type of rock) on one or both sides. They come in a variety of grits, which refers to the roughness of the file surface, and are great for shaping and smoothing nails.
- Glass Nail Files: These files are made of tempered glass and have a fine grit surface that can be used on natural or artificial nails. They are durable and easy to clean, making them a popular choice for professionals and at-home manicurists.
- Metal Nail Files: These files are made of metal, typically stainless steel, and have a rough surface that can file down even the toughest of nails. They are long-lasting and easy to clean, but can be harsh on natural nails if not used properly.
- Ceramic Nail Files: These files are made of ceramic and have a fine grit surface that can be used on natural or artificial nails. They are durable and gentle on nails, making them a great choice for those with weak or damaged nails.
No matter which type of nail file you choose, it’s important to select the right grit for your needs and use it properly to achieve the best results.
Types of Nail Buffers
If you’re looking for a way to achieve a polished, professional-looking manicure without leaving the house, nail buffers are an essential tool to have in your kit. From smoothing out ridges to creating a high-shine finish, nail buffers come in a variety of shapes and sizes to fit your needs.
 Here are some of the most popular types of nail buffers:
- Foam Buffers: These soft, spongy buffers have a different grit level on each side and are perfect for smoothing out bumps and rough spots on your nails. They’re also great for preparing your nails for polish, providing a smooth, even base for your color.
- Block Buffers: These versatile buffers are square or rectangular in shape and come in a variety of grit levels. They can be used for shaping and smoothing nails, as well as buffing and shining for a glossy, salon-worthy finish.
- Electric Buffers: For those who want to take their nail care to the next level, electric buffers are a game-changer. These high-tech devices are powered by electricity and come with different attachments for shaping, buffing, and polishing your nails to perfection. They’re fast, efficient, and provide a professional-level finish with minimal effort.
Choosing the Right Nail File and Buffer
Choosing the right nail file and buffer can be the difference between a beautiful, healthy-looking manicure and a chipped, uneven mess. Here are some important factors to consider when selecting the perfect nail file and buffer for your needs:
Nail Type
Before selecting a nail file or buffer, it’s important to consider the type of nails you have. If you have weak or damaged nails, a gentle file or buffer may be best. If your nails are thick and strong, a more coarse file or buffer may be necessary to achieve the desired shape and smoothness.
Grit
Nail files and buffers come in a variety of grits, which refers to the roughness of the surface. The higher the grit number, the finer the surface will be. A lower grit file or buffer is best for shaping and filing down thick or uneven nails, while a higher grit file or buffer is ideal for smoothing and shining nails.
 Shape and Size
Nail files and buffers come in various shapes and sizes, including straight, curved, and angled. It’s important to select a shape and size that feels comfortable in your hand and allows you to reach all areas of your nails.
Personal Preference
Lastly, personal preference should also be taken into account. If you prefer a more traditional approach to nail care, a basic emery board may be the way to go. If you’re looking for a high-tech option, an electric buffer may be more up your alley. Don’t be afraid to try out different types of files and buffers to see which ones work best for you.
Tips and Tricks for Using Nail Files and Buffers
 While nail files and buffers can be a great addition to your beauty routine, it’s important to use them properly to avoid damaging your nails. Here are some tips and tricks to keep in mind when using nail files and buffers:
- Don’t file too deeply: When filing your nails, be careful not to file too deeply into the nail bed. This can cause pain, bleeding, and even infection. It’s best to file in small increments and check your progress often.
- File in one direction: To avoid damaging your nails, file in one direction rather than using a back-and-forth sawing motion. This will help create a smooth, even surface without causing splitting or weakening of the nails.
- Use a light touch when buffing: When buffing your nails, use a light touch and avoid applying too much pressure. Over-buffing can cause thinning of the nails, which can make them more prone to breaking and peeling.
Conclusion
When using nail files and buffers, it’s important to use them properly to avoid damaging your nails. Take your time, file and buff gently, and follow the tips and tricks outlined above to keep your nails looking healthy and strong. With a little practice, you can achieve salon-worthy results in the comfort of your own home.
From Cuticles to Coats: The Ultimate Guide to Nail Care Products
Introduction
Have you ever stopped to consider the state of your nails?
Often overlooked, our nails play an important role in our overall health and appearance. That’s where nail care products come in. From nail polish to cuticle oil, there are a variety of products available to help us maintain healthy and beautiful nails.
But why is nail care so significant? Not only do our nails protect the sensitive skin beneath them, but they can also provide clues to our overall health.
For example, changes in nail color or texture can indicate underlying health issues. In addition, well-groomed nails can make a big difference in our appearance and confidence.
In this article, we’ll explore different types of nail care products, tips for proper nail care, and common nail problems and solutions.
Whether you’re a nail care novice or a seasoned pro, this guide has something for everyone. So, let’s dive in and discover the secrets to healthy and beautiful nails with Amoca Nails store!
Nail Care Products
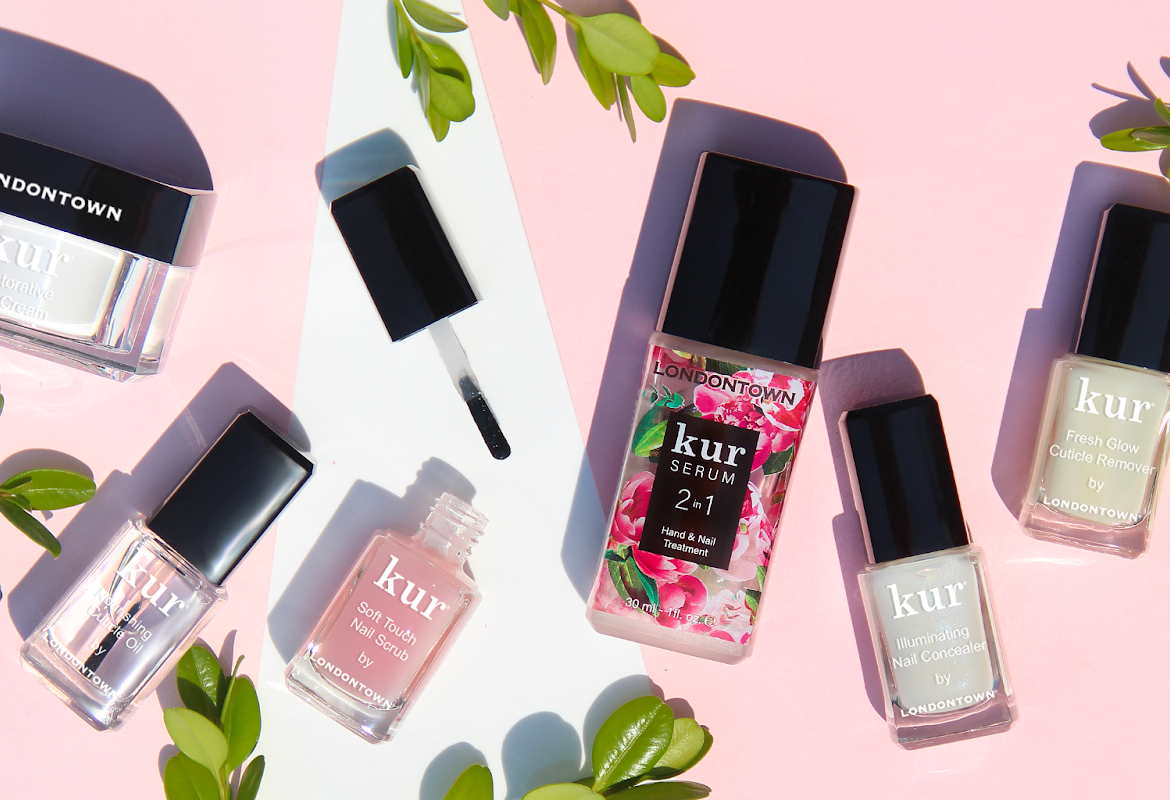
- Nail polish: A colored lacquer is applied to the nails to enhance their appearance. Nail polish comes in a wide variety of colors and finishes, such as matte, glossy, and metallic.
- Nail polish remover: A solution used to remove nail polish from the nails. Nail polish remover typically contains acetone or non-acetone ingredients.
- Base coat: A clear or opaque layer applied to the nails before nail polish to improve its adhesion and prevent staining of the nails.
- Top coat: A clear layer is applied over nail polish to protect it from chipping and give it a glossy finish.

- Cuticle oil: A moisturizing oil applied to the cuticles to soften them and prevent them from drying out. Cuticle oil can also help strengthen the nails.
- Cuticle remover: A gel or liquid is applied to the cuticles to soften them and make them easier to push back or remove.
- Nail strengthener: A product designed to strengthen weak or brittle nails. Nail strengthener can be applied alone or as a base coat.
- Nail hardener: A product designed to harden soft or flexible nails. Nail hardener can also be applied alone or as a base coat.
- Nail growth serum: A product designed to promote nail growth and strengthen nails. Nail growth serum typically contains ingredients such as biotin and keratin to improve nail health.
Types of Nail Care Products
No matter which type of nail care product you choose, it’s important to read the labels carefully and choose products that are safe and effective. Your nails are an significant part of your overall health and appearance, so taking the time to care for them properly is well worth it.
 Chemical-based products: These products can give your nails a shiny and long-lasting finish, but it’s important to consider the potential downsides. Chemical-based nail products can be harsh and may contain ingredients that are known to cause health issues. It’s important to use these products in moderation and take extra care when applying them.
- Natural-based products: If you’re looking for a gentler option for your nails, natural-based products are a great choice. These products often contain nourishing ingredients like plant extracts and vitamins to help keep your nails healthy and strong. Plus, they’re generally safer for you and the environment.
- Organic-based products: For those who are eco-conscious and prefer to use organic and natural products, there are many organic-based nail care products available. These products are made from natural and non-toxic ingredients and are free from harsh chemicals that can damage your nails and skin. Plus, they often come in eco-friendly packaging, making them a sustainable choice.
Considerations When Choosing Nail Care Products
When it comes to choosing nail care products, there are a few important considerations to keep in mind. Here are some factors to consider:
 Ingredients: One of the most important things to consider when choosing nail care products is the ingredients. Look for products that contain nourishing ingredients like vitamins, minerals, and natural oils, and avoid products that contain harsh chemicals like formaldehyde, toluene, and phthalates. Also, if you have any allergies or sensitivities, be sure to read the ingredient labels carefully to avoid any potential reactions.
- Brand reputation: It’s important to choose nail care products from a reputable brand that you can trust. Look for brands that have a good reputation in the industry and that have positive customer reviews. You can also check for certifications like cruelty-free or vegan to ensure that the products align with your values.
- Personal preferences: Everyone has their own personal preferences when it comes to nail care products. Some people prefer natural or organic-based products, while others may prefer traditional chemical-based products.
Additionally, some people may prefer certain types of applicators, like brushes or pens, or may have specific color preferences. It’s important to consider your personal preferences when choosing nail care products to ensure that you’re happy with the results.
Tips for Proper Nail Care
Proper nail care is essential to keeping your nails healthy, strong, and beautiful. By following these simple tips, you can keep your nails looking and feeling healthy and strong:
 Keep nails clean and dry: Regularly washing your hands and drying them thoroughly is an important part of nail care. Bacteria and fungi thrive in warm, moist environments, so keeping your nails clean and dry can help prevent infections.
- Avoid biting nails: Biting your nails can damage the nail bed and make your nails more susceptible to infection. It’s a hard habit to break, but try to keep your nails out of your mouth as much as possible.
- File nails regularly: Filing your nails regularly helps keep them strong and prevents them from breaking or splitting. Use a gentle file and file in one direction to avoid damaging the nail.
- Moisturize nails and cuticles: Just like the rest of your body, your nails need moisture to stay healthy. Use a moisturizer specifically designed for nails and cuticles to keep them hydrated and prevent them from becoming brittle.
- Protect nails from harsh chemicals: Exposure to harsh chemicals can damage your nails and make them more susceptible to infection. Wear gloves when doing household chores or working with chemicals to protect your nails.
Conclusion
In conclusion, nail care is an important aspect of personal hygiene and self-care. Nail care products like nail polish, nail polish remover, and base coats can help you maintain healthy and beautiful nails.
By giving your nails the attention they deserve, you can keep them looking and feeling their best. Remember, healthy nails are a reflection of good overall health, so take care of your nails and you’ll be taking care of yourself.
From Head to Toe: Waxing Supplies for Different Body Parts
Introduction
When it comes to hair removal, waxing is a popular method for achieving smooth, hair-free skin. But, as any experienced waxer will tell you, the key to a successful waxing session is having the right supplies on hand.
From waxing strips to pre- and post-wax products, there are a variety of items that can make your hair removal experience a breeze.
In this article, Amoca Nails Beauty Supply will take a closer look at waxing supplies and everything you need to know about them.
Whether you’re a seasoned professional or a first-timer, read on to learn more about how the right supplies can make all the difference in your hair removal routine!
Types of Waxing Supplies
Before you start your at-home waxing journey, it’s important to know the types of waxing supplies you’ll need to achieve a smooth and hair-free finish. Let’s explore the different types of waxing supplies and how to use them effectively.
Waxing Strips
Waxing strips are thin pieces of material that are used to remove hair from the skin by applying wax and then using the strip to remove it. There are different types of waxing strips available, including cloth and paper strips. Cloth strips are reusable and can be washed after use, while paper strips are disposable. Waxing strips are typically used with soft wax, which is applied to the skin and then removed using the strip.
To use waxing strips, apply the wax to the skin in the desired area and place the strip over the wax. Rub the strip in the direction of hair growth and then quickly remove it in the opposite direction, pulling it off in a swift motion. Waxing strips are easy to use and can be an effective way to remove hair at home.
Waxing Pots
 Waxing pots are containers used to heat and store wax for hair removal. When choosing a waxing pot, consider the type of wax (including microwaveable pots, electric pots, and double boilers) you will be using and the quantity of wax you will need:
- Microwaveable pots are easy to use and can be heated quickly in the microwave.
- Electric pots are more expensive but offer greater control over the temperature of the wax.
- Double boilers are also used to heat wax, but require more time and effort to use.
Some waxing pots even come with temperature controls, which can be helpful in achieving the right consistency for the wax.
Waxing Spatulas
Waxing spatulas are tools used to apply wax to the skin. They come in different sizes and materials, including wooden and metal spatulas.
To use a waxing spatula, scoop the desired amount of wax and spread it over the area to be waxed in a thin, even layer. Using a spatula allows for precise application of the wax and helps to avoid uneven coverage or missed spots
Waxing Supplies for Different Body Parts
Waxing is a popular hair removal method for many people, but did you know that different body parts require different types of waxing supplies? From the face to the bikini area, each body part presents its own unique challenges when it comes to waxing. Let’s take a closer look:
Face Waxing Supplies
When it comes to waxing the face, it’s important to use gentle and precise supplies. For example:
- Hard wax is typically used for facial hair removal, as it is less likely to pull or irritate sensitive skin.
- Spatulas with smaller, angled tips are best for precise application and targeting specific areas.
Body Waxing Supplies
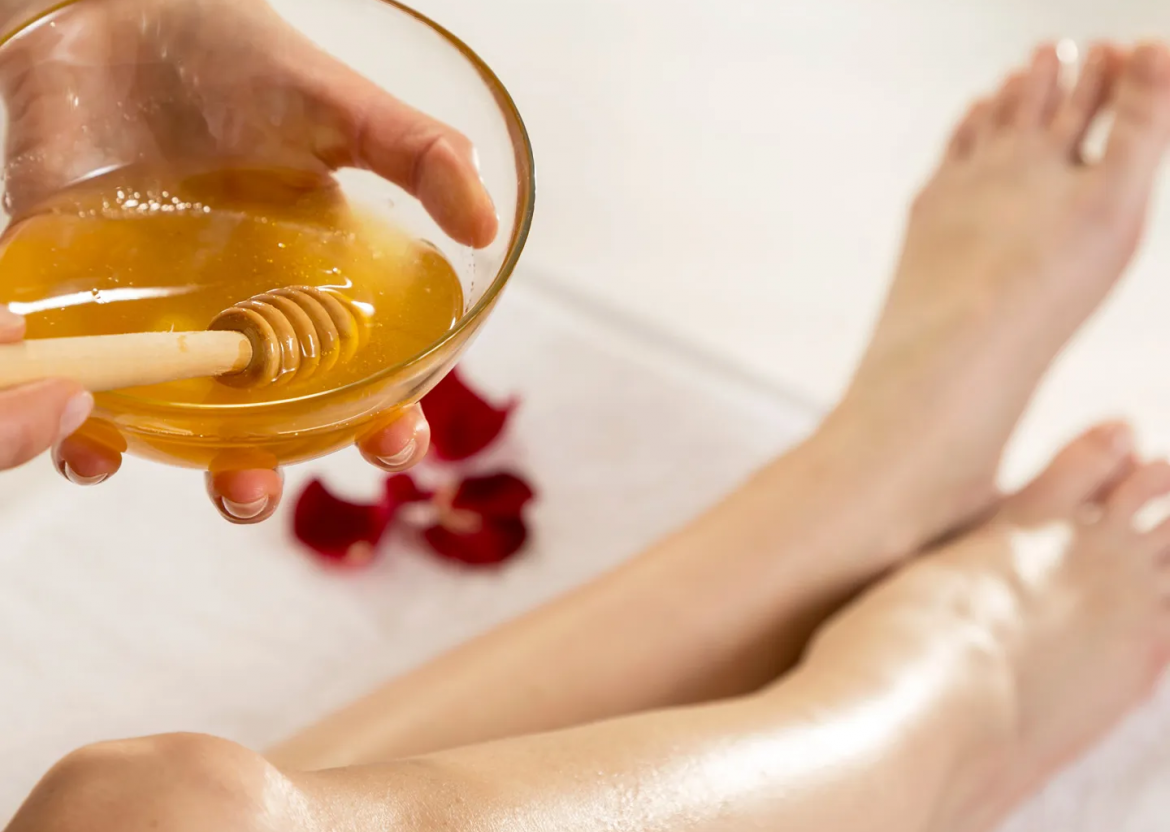
 For larger areas of the body, such as the legs, arms, and chest, different types of waxing supplies may be needed:
- Soft wax is commonly used for body waxing, as it can cover larger areas quickly and is easily removed with waxing strips.
- Waxing strips can be used for body waxing, but larger strips may be needed to cover larger areas..
Bikini and Brazilian Waxing Supplies
Bikini and Brazilian waxing require more specialized supplies:
- Hard wax is typically used for bikini and Brazilian waxing, as it is less likely to pull or irritate sensitive skin in the pubic area.
- Smaller waxing strips or no strips at all may be used for more precise waxing in the pubic area.
- Spatulas with smaller, angled tips can be used for precise application in the bikini area.
Choosing the Right Waxing Supplies
Choosing the right waxing supplies is crucial to achieve the best results and minimizing discomfort or injury. There are several factors to consider when selecting the appropriate waxing supplies, including your skin type, hair type, and personal preferences.
Skin Type
Different skin types may react differently to waxing, so it’s essential to choose waxing supplies that are gentle and compatible with your skin type. Here are some general guidelines:
- Sensitive Skin: If you have sensitive skin, choose waxing supplies that are specifically formulated for sensitive skin, such as hard wax or waxing strips that are infused with soothing ingredients like aloe vera or chamomile.
- Dry Skin: For dry skin, choose waxing supplies that provide moisturizing benefits, such as pre-and post-waxing oils or lotions.
- Oily Skin: If you have oily skin, choose waxing supplies that can help control oil production and prevent breakouts, such as waxing strips with tea tree oil or salicylic acid.
Hair Type
Different hair types may require different types of waxing supplies to achieve optimal results. Here are some guidelines:
- Coarse Hair: For coarse hair, choose waxing supplies that are strong enough to grip the hair and remove it from the root, such as soft wax or waxing strips with a stronger adhesive.
- Fine Hair: For fine hair, choose waxing supplies that are gentle and less likely to pull or break the hair, such as hard wax or waxing strips with a milder adhesive.
Personal Preferences
 Personal preferences can also influence your choice of waxing supplies. Here are some examples:
- Pain Tolerance: If you have a low pain tolerance, you may prefer to use hard wax or numbing creams before waxing to minimize discomfort.
- Convenience: If you prefer a quick and easy hair removal method, you may opt for waxing strips or pre-made waxing kits that are ready to use.
- Environmental Factors: If you’re concerned about the environmental impact of your waxing supplies, you may choose eco-friendly options that are made from natural or sustainable ingredients.
Conclusion
Overall, using the right waxing supplies can help you achieve your desired hair removal results while minimizing discomfort, irritation, and injury. We recommend doing your research and consulting with a skincare professional to determine the best waxing supplies for your individual needs and preferences. With the right supplies and techniques, you can enjoy smooth, hair-free skin that lasts for weeks.
The Power of Cuticle Oil: Revitalizing Your Nails Introduction
Introduction
In this fast-paced world, our nails often take a back seat in our beauty routines. However, healthy nails not only look great but also can help us feel more confident and put together. Cuticle oil is a simple and effective way to take care of your nails and cuticles, and it doesn’t have to take up a lot of time or effort.
In this article, Amoca Nails and Beauty Supply will dive into the world of cuticle oil and explore its benefits, how to use it, and how to choose the right one for your needs. Whether you’re a nail care enthusiast or a beginner, you’ll discover how oils can help you achieve the perfect manicure and keep your nails looking their best.
So, let’s get started!
What is cuticle oil?
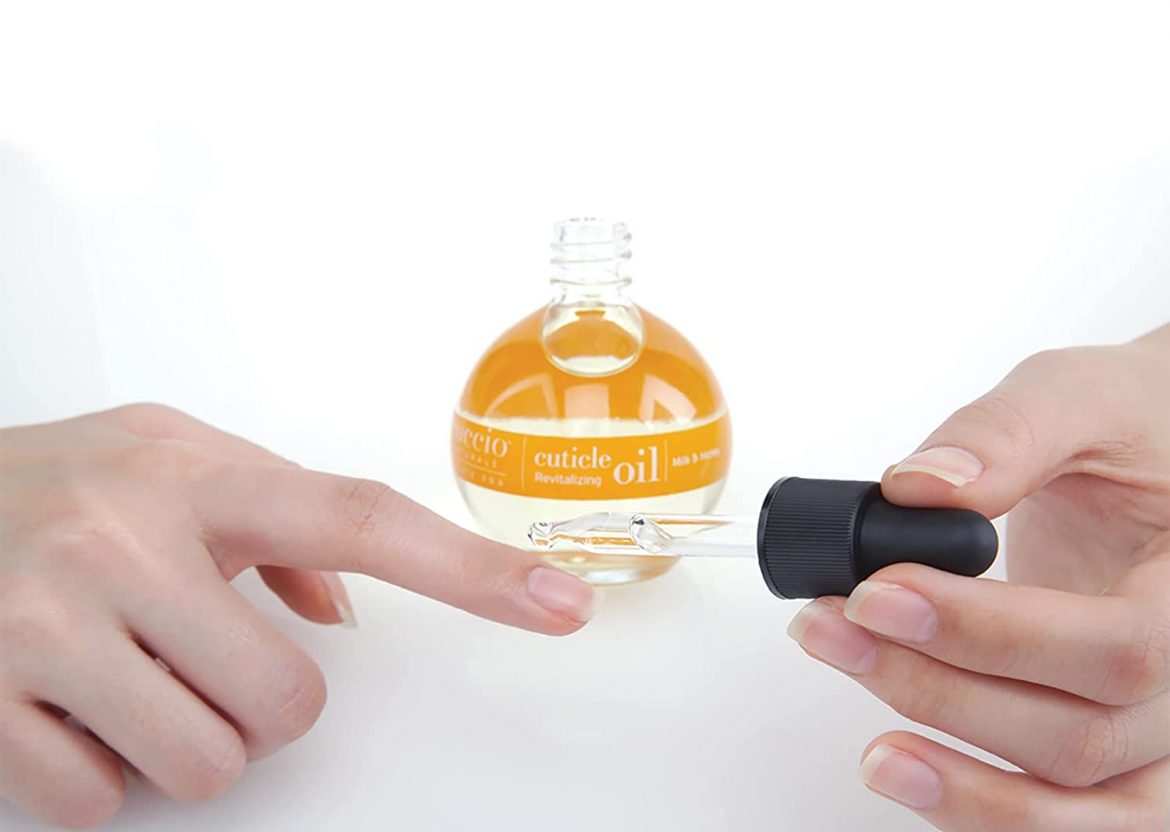
Cuticles are the thin layer of skin at the base of your nails that act as a barrier, protecting your nails from harmful bacteria and other infections.
Have you ever noticed that the skin around your nails can become dry, cracked, and even painful at times? This is where cuticle oil comes in as a game-changer!
Cuticle oil is a beauty product that is used to nourish and protect the cuticles. It is a blend of different natural oils, such as jojoba oil, almond oil, and vitamin E oil, that moisturizes and softens the cuticles, making them look healthy and beautiful.
 In other words, cuticle oil is a nourishing and moisturizing product that can help you maintain healthy and beautiful nails. It’s an often-overlooked aspect of nail care that can make a significant difference in the overall appearance and health of your nails.
Using oils regularly can have several benefits for your nail health and appearance. For instance,
- It can help to prevent dryness and cracking of the cuticles, which can be painful and uncomfortable.
- Promote nail growth by nourishing the nail bed and supporting healthy nail growth.
- Additionally, cuticle oil can help to improve the overall appearance of your nails, making them look healthier, smoother, and more attractive.
Types of cuticle oils
Cuticle oil is typically made up of a blend of natural oils that moisturize and soften the cuticles. These oils contain essential fatty acids, antioxidants, and other nutrients that help to nourish and protect the skin.
 There are several types of oils available on the market, each with its own unique benefits. Some cuticle oils are designed to provide deep hydration, while others are formulated to strengthen and protect the nails. Here are some of the most common types of oils:
- Jojoba oil: Jojoba oil is a popular ingredient in many cuticle oils. It is easily absorbed into the skin and contains essential fatty acids, vitamins, and minerals that help to nourish and protect the skin.
- Almond oil: Almond oil is rich in vitamin E and other antioxidants, making it an excellent choice for moisturizing and protecting the skin. It is also known to have anti-inflammatory properties that can soothe irritated skin.
- Vitamin E oil: Vitamin E oil is a potent antioxidant that helps to protect the skin from damage caused by free radicals. It is often added to cuticle oils to promote healthy nail growth and prevent dryness and cracking.
How to use cuticle oil?
Cuticle oil is simple to use and can be incorporated into your daily beauty routine. Here are some guidelines on how to use oil effectively:
Application methods
- Brush-on applicator: Dip the brush into the oil and apply it directly onto your cuticles. Massage the oil into your skin for a few minutes, making sure to cover the entire nail bed.
- Pen-style applicator: Twist the end of the pen to dispense the oil onto your cuticles. Apply the oil to the entire nail bed, using the brush to massage the oil into the skin.
- Roller ball applicator: Roll the applicator over your cuticles, allowing the oil to dispense evenly. Massage the oil into your skin, making sure to cover the entire nail bed.
Frequency of use
The frequency of using cuticle oil depends on your nail care needs. However, it is generally recommended to use oil at least once a day. For best results, apply cuticle oil after washing your hands or taking a shower, when the skin is soft and most receptive to the oil.
Dos and Don’ts when using cuticle oil

- Do massage the oil into your cuticles and nail beds for maximum absorption.
- Do apply the oil to your nails and cuticles daily for best results.
- Do use oil as a part of your overall nail care routine, including keeping your nails clean and trimmed.
- Don’t apply too much oil at once, as this can lead to greasy or oily nails.
- Don’t use cuticle oil on broken or infected skin, as this can worsen the condition.
- Don’t use oil as a substitute for proper nail care, such as avoiding harsh chemicals and protecting your nails from damage.
Choosing the right cuticle oil
 With so many types of cuticle oils available on the market, it can be overwhelming to choose the right one for your needs. Here are some factors to consider when selecting an oil:
- Ingredients: Look for cuticle oils that contain natural ingredients, such as jojoba oil, almond oil, and vitamin E oil. Avoid products that contain synthetic fragrances or other harsh chemicals that can irritate the skin.
- Absorption: Choose an oil that absorbs quickly and easily into your skin. Oils that leave a greasy residue can be uncomfortable and may interfere with your daily activities.
- Scent: Oils come in a variety of scents, from unscented to lavender or citrus. Choose a scent that you enjoy and find relaxing.
- Brand reputation: Research the brand and read reviews from other customers to ensure that the product is high-quality and effective.
When choosing a cuticle oil, it can be helpful to read reviews and recommendations from other customers. You can also ask for recommendations from friends, family members, or beauty professionals.
Conclusion
Overall, cuticle oil is a small investment that can provide significant benefits for your nails and cuticles. By taking the time to care for your nails, you can enhance your overall appearance and boost your confidence. So why not give cuticle oil a try and see the results for yourself?
Nail Liner 101: A Comprehensive Guide to Creating Stunning Nail Art
Introduction
Nail art has exploded in popularity over the past few years, with endless possibilities for expressing your personal style and creativity. From elaborate designs to bold colors and patterns, there’s no limit to what you can do with your nails. And if you’re looking to take your nail art to the next level, one tool you might want to add to your arsenal is nail liner.
Nail liner is a versatile and easy-to-use tool that can help you create intricate designs and eye-catching patterns on your nails. Whether you’re a beginner or a seasoned nail artist, nail liner can add an extra edge to your nail art game and allow you to unleash your creativity in new ways.
In this article, Amoca Nails and Beauty Supply will take a closer look at nail liners, including the different types available, techniques for application, tips, and tricks for achieving stunning results, and recommendations for top-rated products.
So, whether you’re looking to create intricate designs or just add a pop of color to your nails, read on to learn all about the art of nail liner!
Types of Nail Liners
Nail liners come in a variety of forms, each with its own unique advantages and techniques. Here are the most common types of nail liners:
- Brush-on liners: Brush-on nail liners come in a small bottle with a brush applicator, much like regular nail polish. They are typically available in a range of colors and finishes, including matte, metallic, and glitter. Brush-on liners are perfect for creating intricate designs or adding fine details to your nail art. They require a steady hand and a bit of practice to apply, but once you get the hang of it, the possibilities are endless.
- Pen liners: Pen nail liners are similar to brush-on liners, but they come in a pen-like container with a fine tip for precise application. They are usually available in fewer colors and finishes than brush-on liners, but they are easier to control and ideal for creating clean, sharp lines.

- Strip liners:Strip nail liners are thin, adhesive strips that come in a variety of colors and patterns. They are ideal for creating straight lines or geometric shapes, and they can be easily trimmed to fit the shape and size of your nails. Strip liners are quick and easy to apply, making them a great option for beginners or those short on time.
- Sticker liners: Sticker nail liners are similar to strip liners, but they come in pre-cut shapes or designs that can be applied directly to the nail. They are available in a variety of colors and patterns, including floral, geometric, and glitter. Sticker liners are perfect for creating intricate designs without the need for precision application.
Each type of nail liner has its own unique advantages and techniques, so it’s important to choose the right one for the design you have in mind.
Application Techniques
Once you’ve chosen the type of nail liner you want to use, it’s time to learn some application techniques to achieve stunning results.
 Here are some techniques to consider when applying nail liner:
- Base coat: Always start with a base coat to protect your nails and provide a smooth surface for the liner to adhere to.
- Practice on paper: Before applying the liner directly to your nails, practice your design on a piece of paper or a plastic sheet to get comfortable with the application technique.
- Clean your nails: Make sure your nails are clean and dry before applying the liner. Any oils or dirt on your nails can interfere with the liner’s ability to adhere.
- Use a steady hand: For brush-on and pen liners, use a steady hand and apply gentle pressure to create clean, precise lines.
- Be patient: Allow each layer of liner to dry completely before adding another layer or applying a top coat.
- Apply top coat: Once you’ve completed your design, apply a top coat to seal in the liner and protect your nails.
- Experiment with different designs: Don’t be afraid to experiment with different designs and techniques to find what works best for you. The more you practice, the better you’ll become at creating stunning nail art with liner.
By following these application techniques, you can create professional-looking nail designs with ease.
Designs and Styles
 Nail liners can be used to create a wide range of designs and styles to suit any occasion or personal preference. Here are some popular designs and styles to consider when using nail liners:
- French tip: Create a classic French tip by using a white nail liner to draw a thin line along the edge of the nail, or create a colorful twist by using a different color instead of white.
- Geometric shapes: Use nail liners to create geometric shapes like triangles, squares, and diamonds for a modern, edgy look.
- Polka dots: Create a fun, playful design by using a nail liner to draw small polka dots in different colors on your nails.
Tips for Using Nail Liners
To achieve the best results when using nail liners, consider the following tips:
- Practice makes perfect: Nail art requires patience and practice, so don’t get discouraged if your first attempts don’t turn out as you hoped. Keep practicing and you’ll get better with time.
- Start with simple designs: If you’re new to nail art, start with simple designs like stripes or dots, and then progress to more complex designs as you gain confidence.
- Use quality nail liners: Invest in good-quality nail liners to ensure they apply smoothly and provide long-lasting results.
- Experiment with different colors and finishes: Nail liners are available in a wide range of colors and finishes, so don’t be afraid to experiment with different combinations to create unique designs.
- Seal with a top coat: Always seal your nail art with a top coat to protect it from chipping and peeling, and to give it a shiny finish.
Conclusion
To get the most out of your nail liner, it’s important to invest in good-quality products, experiment with different designs and styles, and practice patience and attention to detail. With a little practice and creativity, you can create stunning nail art designs that showcase your unique personality and sense of style.
Overall, we highly recommend adding nail liners to your nail care routine to add some fun and creativity to your nails. Give it a try and see the amazing results for yourself!
How To Soft Wax At Home In 4 Simple Steps? – AMOCA NAILS
Introduction
 In this beginner’s guide to soft wax, Amoca Nails Beauty Supply will cover everything you need to know to get started, including the different types of soft wax, how to prepare for waxing, and tips for getting the best results.
Whether you’re looking to wax your legs, underarms, or bikini area, this guide will help you achieve smooth, hair-free skin at home.
So, let’s get started!
Different Types of Soft Wax
Waxing can be intimidating for beginners, especially when it comes to choosing the right type of wax. There are two main types of soft wax: hard wax and strip wax.
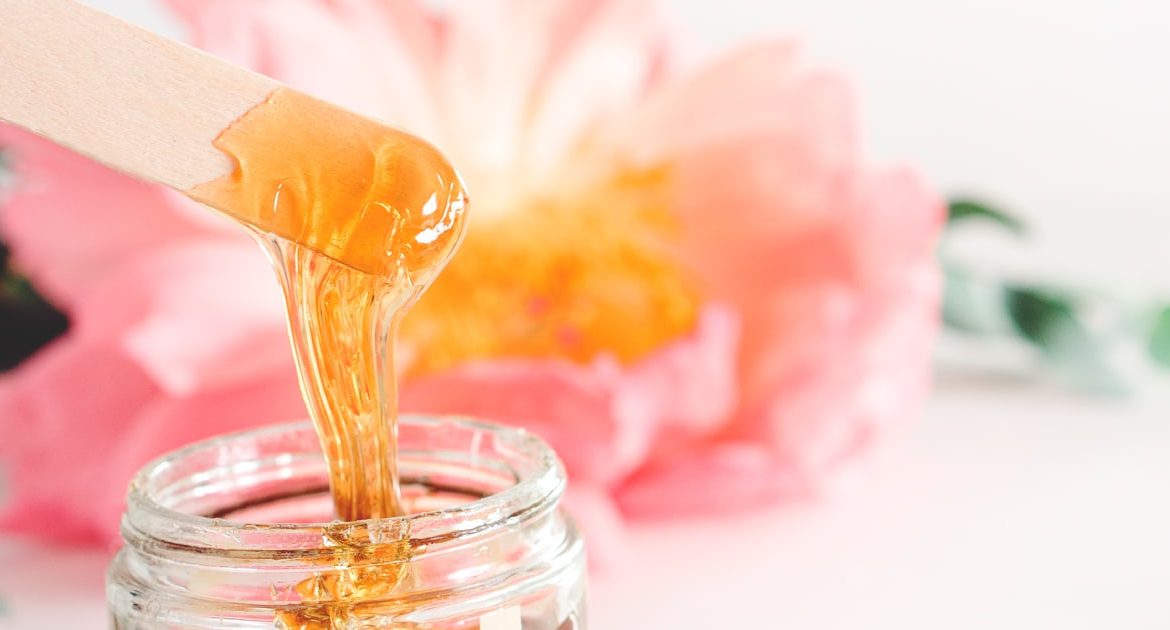
Hard wax
Hard wax, also known as hot wax, is like a superhero in the world of hair removal. It’s applied in a thick layer to the skin and allowed to cool and harden, creating a superhero-worthy grip on your unwanted hair.
Once the wax has hardened, it’s ready to be peeled off, taking your hair with it. Hard wax is a popular choice for sensitive areas like the bikini area, as it adheres only to the hairs and not the skin.
Strip wax
On the other hand, strip wax is the trusty sidekick that gets the job done quickly and efficiently. Strip wax is applied in a thin layer to the skin and then removed with a strip of cloth or paper. This type of wax is typically used for larger areas of the body, such as the legs and arms.
Strip wax adheres to both the hairs and the skin, which can make it more painful than hard wax. However, it’s also easier to apply and remove than hard wax, making it the perfect choice for those who want to get the job done quickly.
 So, whether you want to tackle sensitive areas with ease or a trusty sidekick who needs to get the job done quickly, there’s a type of soft wax out there for you. Choose the type that works best for you and get ready to achieve smooth, hair-free skin.
Preparing for Soft Waxing
If you want your waxing experience to be smooth and successful, preparation is key. Here are some essential steps to take before you start waxing:
- First, cleanse and exfoliate the area you plan to wax. This will help remove any dirt, oil, or dead skin cells that can interfere with the wax’s grip on your hair. Plus, it will help prevent ingrown hairs and keep your skin looking smooth and healthy.
- Next, trim your hair to the optimal length. Hair that’s too short may not be long enough for the wax to grab onto, while hair that’s too long can be more painful to remove. A good rule of thumb is to trim your hair to about a quarter of an inch, or the length of a grain of rice.
- Finally, resist the urge to take a hot shower before waxing. Hot water can soften your skin and make it more susceptible to irritation or injury during the waxing process. Instead, opt for a lukewarm shower or simply clean the area with a damp cloth before you start waxing.
How to Use Soft Wax
 Now that you’re prepped and ready, it’s time to get waxing! Here’s a step-by-step guide on how to use soft wax:
Step 1: Heat the wax
If you’re using strip wax, warm it up in the microwave or using a wax warmer until it’s a smooth, spreadable consistency. For hard wax, heat it until it’s melted and runny.
Step 2: Apply the wax
Using a spatula, apply the wax to the area you want to wax in the direction of hair growth. Make sure the layer of wax is thick enough to grab onto your hair but not too thick that it becomes difficult to remove. If you’re using strip wax, place a strip of cloth or paper on top of the wax and press down firmly.
Step 3: Remove the wax
If you’re using hard wax, wait until the wax has hardened and then grip the edge of the wax with your fingers and pull it off in the opposite direction of hair growth. If you’re using strip wax, hold the end of the strip and quickly pull it off in the opposite direction of hair growth. Make sure to hold your skin taut with one hand while you remove the wax with the other.
Step 4: Post-wax care
After you’re done waxing, apply a soothing lotion or oil to help calm any redness or irritation. Avoid hot showers, tight clothing, and exercise for at least 24 hours after waxing to reduce the risk of ingrown hairs or irritation.
Soft Waxing Tips
 Even though waxing at home can be a daunting task, with the right technique, you can achieve professional-level results. Here are some tips for using soft wax:
- Use the right temperature: It’s important to heat your wax to the right temperature to ensure it’s easy to apply and remove. If the wax is too hot, it can burn your skin, while wax that’s too cool won’t be effective in removing hair. Test the wax on the back of your hand to ensure it’s at the right temperature before you start waxing.
- Apply in the right direction: Always apply the wax in the direction of hair growth. This will help the wax adhere to your hair better, making it easier to remove. Applying the wax in the wrong direction can also lead to ingrown hairs and skin irritation.
- Stretch the skin: When you’re ready to remove the wax, stretch the skin in the opposite direction of hair growth with one hand while using the other hand to remove the wax. This will help reduce discomfort and make it easier to remove the hair.
Conclusion
Congratulations! You’ve completed the beginner’s guide to soft waxing. We’ve covered everything from the different types of soft wax to tips and tricks for achieving the best results.
Remember, preparation is key when it comes to soft waxing. Always cleanse and exfoliate before you start, trim your hair to the optimal length, and avoid hot showers. When it’s time to wax, use the right temperature, apply the wax in the right direction, stretch your skin, and work in sections.
Don’t be afraid to try soft waxing at home. With a little practice and patience, you’ll be able to achieve smooth, hair-free skin without leaving the comfort of your own home. And if you ever feel overwhelmed or unsure, don’t hesitate to reach out to a professional for guidance.
The Nail Polish Encyclopedia: A Comprehensive Guide to Colors, Types, and Techniques
Introduction
Nail polish is a versatile and affordable way to express yourself and add some color to your life. Whether you’re a seasoned nail art pro or a beginner looking to add a pop of color to your nails, this comprehensive guide is here to help.
In this guide, Amoca Nails and Beauty Supply will cover everything you need to know about nail polish, from the different types available to how to apply and remove it safely.
So, whether you’re looking to create an eye-catching manicure or simply want to keep your nails healthy and beautiful, read on to discover the ultimate guide!
II. Types of nail polish
When it comes to polish, there are a variety of types to choose from, each with its own unique features and benefits. Here’s a breakdown of the most popular types to help you choose the perfect option for your needs:
Traditional
Traditional polish is the most common type and is readily available in a variety of colors and finishes. It’s also the most affordable type. The application process is straightforward, but it may take longer to dry compared to other types. Additionally, traditional one may chip or fade within a few days to a week.
Pros:
- Affordable
- Wide range of colors and finishes
- Easy to apply
Cons:
- May take longer to dry
- Shorter wear time compared to other types
Gel
Gel polish is a popular choice for those seeking a long-lasting manicure. It’s formulated to last up to two weeks without chipping or fading, making it ideal for special occasions or those who don’t have time for frequent touch-ups. Gel nail requires a UV or LED light to cure, but the application process is similar to traditional one.
Pros:
- Long-lasting
- High shine finish
- Resistant to chipping
Cons:
- Requires UV or LED light to cure
- More difficult to remove than the traditional.
 Powder Dip
Powder dip nail polish is a relatively new type that’s growing in popularity due to its easy application and long-lasting formula. It’s available in a wide range of colors and finishes and is known for its durability. The application process involves dipping the nails into a colored powder and sealing with a topcoat.
Pros:
- Long-lasting
- Easy to apply
- Wide range of colors and finishes
Cons:
- Requires professional application
- More difficult to remove than the traditional.
Long-lasting Nail
Lastly, long-lasting nail polish is a great option for those who want a low-maintenance manicure that can last up to 10 days without chipping or fading. It’s available in a variety of colors and finishes and is formulated to be resistant to wear and tear.
Pros:
- Low-maintenance
- Long-lasting
- Wide range of colors and finishes
Cons:
- May take longer to dry.
- Can be more expensive.
Sheer Nail
Sheer polish is a subtle, natural-looking option that’s perfect for those who want to enhance the natural beauty of their nails without drawing too much attention. It’s available in a variety of shades, and while it doesn’t provide full coverage, it can give your nails a healthy-looking glow.
Pros:
- Subtle, natural look
- Great for enhancing the natural beauty of your nails
Cons:
- May require multiple coats to achieve desired opacity
- Shorter wear time compared to other types
How to Apply Nail Polish?
 Applying polish may seem like a simple task, but there are a few tips and tricks that can help you achieve a flawless, long-lasting manicure. Here’s a step-by-step guide on how to apply it:
- Prep your nail: Before applying polish, it’s essential to prep your nails properly. Start by removing any old polish and then shape and file your nails to your desired length and shape. Next, use a cuticle pusher to push back your cuticles gently, or trim them if necessary.
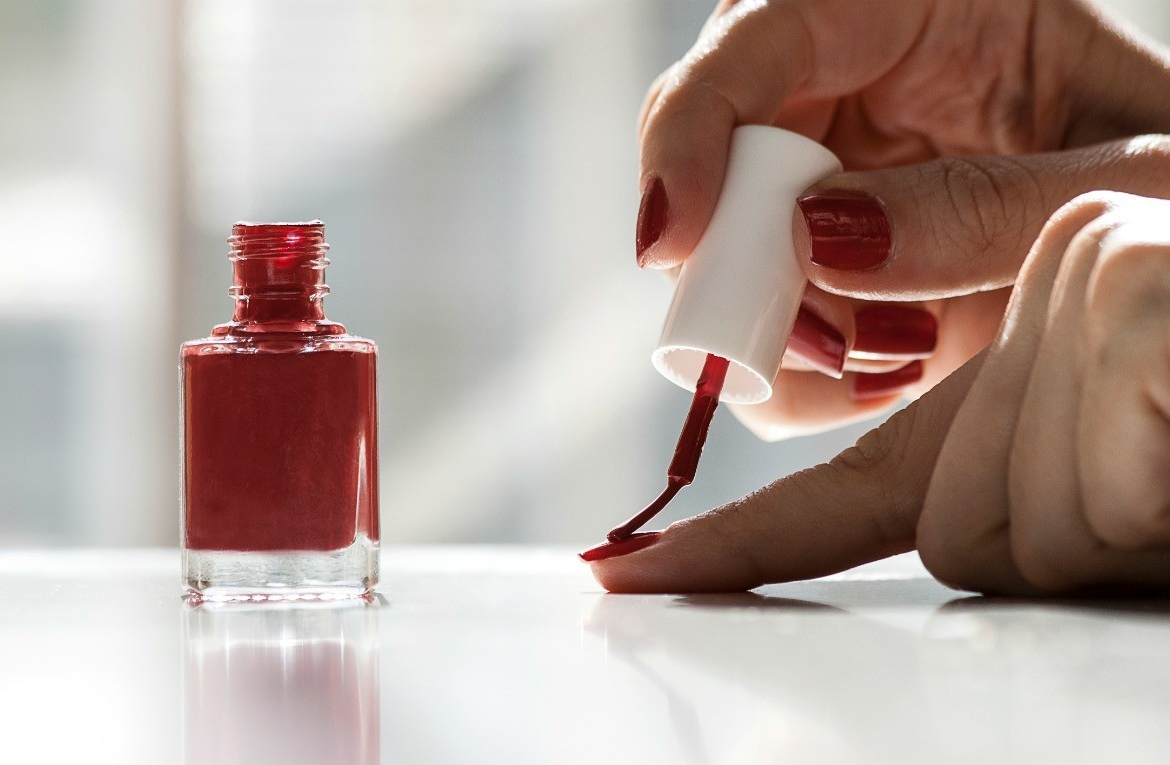
- Apply a base and nail polish coat: A base coat helps to smooth out your nails’ surface and prevent staining from colored nails. Apply a thin layer of base coat and let it dry completely before moving on to the next step. Then apply polish, start with a thin layer, and then wait for it to dry before applying a second coat. To prevent bubbles, paint each nail with three strokes: one in the center and one on each side.
- Apply a topcoat: A topcoat helps to protect your nails from chipping and adds shine to your nails. Apply a thin layer of topcoat, and let it dry completely.
- Clean up mistakes: Use a small brush or a cotton swab dipped in nail polish remover to clean up any mistakes or excess polish around your nails.
- Let your nails dry completely: It’s essential to let your nails dry completely before doing any activities that could smudge your polish. To be safe, it’s best to wait at least an hour before doing anything that could potentially damage your nails.
How to Remove?
 Removing polish is an essential part of maintaining healthy and beautiful nails. Here are the tools and steps you need to follow for easy and effective removal:
First, you will need the following tools: Cotton balls or pads, nail polish remover, small bowl, small brush or cotton swabs
Then, follow these simple steps to remove your nail polish:
- Pour some remover into a small bowl and soak your nails in it for a few minutes. Alternatively, you can use cotton balls or pads soaked in nail polish remover and place them on each nail.
- After soaking your nails, use a cotton ball or pad to wipe off the, starting from the base of your nails and working towards the tip. You may need to use several cotton balls or pads to remove all the polish.
- If there is any residue left on your nails, use a small brush or cotton swab dipped in remover to clean it up.
- Once you have removed all the nail polish, wash your hands with soap and water to remove any remaining residue.
Conclusion
In this comprehensive guide, we have covered everything you need to know about nail polish. While it is a great way to add some flair to your nails, it’s important to keep your nails healthy by using high-quality polishes and removing them properly.
Don’t forget to moisturize your nails regularly with cuticle oil or hand cream to keep them strong and healthy. We hope this guide has been helpful and informative for you. Happy polishing!

From Latex to Nitrile: Exploring the World of Disposable Glove Supply
Introduction
In today’s world, the use of disposable gloves has become increasingly important in various industries. From the medical and healthcare industry to the food industry and everything in between, disposable gloves are a critical aspect of ensuring safe and hygienic practices. These gloves provide a barrier against contamination and are essential for protecting workers and customers alike.
As a result, the disposable glove supply market has experienced significant growth in recent years, with a wide range of options available for different industries and uses. Whether you’re looking for latex, nitrile, vinyl, or polyethylene gloves, there’s a supplier out there who can meet your needs.
In this guide, Shop Amoca Nails provide an overview of the different types of disposable gloves, the various industries that rely on them, and the top suppliers in the market. We’ll also offer some tips on how to choose the right gloves for your specific needs and best practices for using them effectively. So let’s dive in and explore the world of disposable glove supply!
Types of Disposable Gloves
When it comes to disposable gloves, there are various types available in the market, each with its unique features and benefits. From medical professionals to food service workers, these gloves play a crucial role in maintaining hygiene and protecting against contamination.
- Latex gloves are known for their flexibility, comfort, and tactile sensitivity. They are made from natural rubber and are the most common type of gloves used in the medical industry.
- Nitrile gloves, on the other hand, are an excellent alternative for those with latex allergies. They provide excellent resistance to chemicals, punctures, and tears, making them a popular choice for industrial and laboratory settings.
- Vinyl gloves are a cost-effective option and are commonly used in food service industries. They provide adequate protection against contamination but are less durable compared to latex and nitrile gloves.
- Polyethylene gloves are the most economical type of disposable gloves and are often used for short-term activities that do not require high-level protection, such as food handling or light cleaning.
With such a wide range of disposable gloves available, it’s crucial to choose the right type based on your specific needs and industry requirements.
Choosing the Right Disposable Gloves
 Choosing the right disposable gloves is crucial to ensure safety and efficiency in various industries before thinking of deciding on a disposable glove supply. Here are some factors to consider when selecting disposable gloves:
- Material: Consider the material of the gloves to ensure that they are suitable for the task at hand. For instance, nitrile gloves are more suitable for handling chemicals than latex gloves.
- Size: Ensure that the gloves fit properly to avoid tearing or slipping during use.
- Thickness: The thickness of the gloves should be appropriate for the task at hand. Thicker gloves provide more protection, but may hinder dexterity.
- Powdered or Powder-free: Powdered gloves are easier to put on and take off, but they may cause allergic reactions in some individuals. Powder-free gloves are a safer option for those with allergies.
- Quality: Consider the quality of the gloves to ensure that they meet industry standards and provide adequate protection.
Best practices for using disposable gloves
- Wash your hands thoroughly before putting on gloves.
- Ensure that the gloves are the right size and fit properly.
- Avoid reusing gloves and dispose of them properly after use.
- Change gloves regularly, especially when moving between different tasks or handling different materials.
By considering these factors and following best practices, you can choose the right disposable gloves for your needs and ensure safety and efficiency in your workplace.
Top Disposable Glove Suppliers
 Amoca Nails Beauty Supply
Amoca Nails Beauty Supply is a renowned disposable glove supply, primarily catering to the needs of the nail and beauty industry. Their inventory includes a wide range of latex and vinyl gloves, suitable for different applications. They also offer disposable gloves in various sizes to meet many customers’ preferences.
In addition to gloves, they provide a variety of beauty products and salon essentials. With competitive pricing and occasional promotions, Amoca Nails Beauty Supply is a popular choice among nail and beauty professionals. Customers have rated their products and services highly for their quality and reliability.
Glove America
Glove America is a US-based disposable glove supply that caters to various industries, including healthcare, food, and manufacturing. They offer a comprehensive range of gloves made from high-quality materials, including latex, nitrile, and vinyl.
Their products come in different sizes and colors, ensuring the perfect fit and preference for their customers. They also provide custom branding and packaging options for businesses that require personalized gloves.
With competitive pricing and regular discounts, Glove America has established itself as a leading supplier in the disposable glove market. Customer reviews attest to their excellent product quality and customer service.
Le Famille Industrial Supplies

Le Famille Industrial Supplies is a trusted disposable glove supply and other personal protective equipment (PPE) in Australia. They specialize in providing high-quality gloves made from latex, nitrile, vinyl, and polyethylene, suitable for various industries, including healthcare, food, and cleaning.
They also offer gloves in different sizes and colors, catering to different preferences. Along with gloves, they provide a range of PPE, including face masks, safety goggles, and coveralls.
They are known for their competitive pricing and prompt delivery, making them a preferred choice among businesses that require disposable gloves in bulk. Customer reviews attest to their exceptional service and product quality.
Conclusion
The use of disposable gloves has become increasingly important in various industries, from healthcare to food service to manufacturing. With the wide range of options available in the disposable glove supply market, it can be overwhelming to choose the right gloves for specific needs.
In this guide, we have discussed the types of disposable gloves, top suppliers in the market, and factors to consider when selecting gloves. We have also provided best practices for using disposable gloves to ensure their effectiveness in providing protection.
Hope that everyone is mindful of the importance of using disposable gloves and being able to select the right gloves for their specific needs.
The Best Nail Beauty Supply Adelaide For The Perfect Mani-Pedi
Introduction
When it comes to expressing your personal style, your nails are like a blank canvas. From bold colors to intricate designs, your nails can reflect your personality and mood. That’s why nail beauty supply stores have become increasingly popular in recent years, offering a wide range of products and tools to help you achieve the perfect manicure.
Adelaide is no exception, with a thriving market for nail beauty supply Adelaide. Whether you’re a professional nail artist or a DIY enthusiast, Adelaide has plenty of options to help you create beautiful nails at home or in the salon.
In this guide, Amoca Nails and Beauty Supply Adelaide explore the types of nail beauty supply Adelaide, top stores in the area, factors to consider when choosing a store, and tips for shopping for nail supplies. So, let’s get started!
Types of Nail Beauty Supplies Available in Adelaide
Nail beauty supply Adelaide stores offer a wide range of products and tools to help you achieve your desired nail look. Whether you prefer the traditional nail polish, acrylics, or gel polish, there are plenty of options available to suit your needs and budget.
Nail Polish
Nail polish is a staple in any nail beauty supply Adelaide. It’s available in a variety of colors and finishes, including matte, glitter, metallic, and neon. Popular nail polish brands available in Adelaide include OPI, Essie, Sally Hansen, and Revlon.
Prices vary depending on the brand and type of polish, with some brands ranging from $10 to $20 per bottle.
Nail Art Tools
Nail art tools are essential for creating intricate and unique designs on your nails. Nail beauty supply Adelaide stores offer a variety of tools, including brushes, dotting tools, stencils, and rhinestones.
Prices for nail art tools can vary greatly, from a few dollars for basic brushes to over $100 for a full nail art kit.
 Acrylic Nails and Supplies
Acrylic nails are a popular option for those looking to enhance the length and strength of their natural nails. Nail beauty supply Adelaide stores offer a range of acrylic nail kits and supplies, including nail forms, acrylic powders, and brushes.
Prices for acrylic nail supplies can vary widely depending on the brand and quality, ranging from $10 for a basic kit to $100 or more for a professional-grade set.
Gel Polish and Supplies
Gel polish is a long-lasting alternative to traditional nail polish. It’s cured under a UV or LED light and can last up to three weeks without chipping or peeling. Nail beauty supply Adelaide stores offer a variety of gel polish brands and supplies, including base and top coats, curing lamps, and gel polish remover.
Prices for gel polish can range from $20 to $40 per bottle, while gel polish kits and supplies can range from $50 to $200.
Nail Extensions and Tips
Nail extensions and tips are another popular options for those looking to enhance the length and shape of their nails. Nail beauty supply Adelaide stores offer a range of options, including plastic tips, fibreglass extensions, and gel extensions.
Prices for nail extensions and tips can vary depending on the type and quality, ranging from $10 for a basic set of tips to $50 or more for a professional-grade kit.
Top Nail Beauty Supply Stores in Adelaide
1. Amoca Nails Beauty Supply
 If you’re looking for a one-stop shop for all your nail beauty needs, look no further than Amoca Nails Beauty Supply. It is one of the most well-known nail beauty supply Adelaide stores. We offer a vast range of nail products and tools, making it a go-to destination for both professional nail artists and DIY enthusiasts.
The store offers a comprehensive range of nail beauty products, including nail polish, acrylics, gel polishes, nail art tools, and other accessories.
Amoca Nails Beauty Supply has received positive reviews from customers, with many praising the store’s extensive range of products and knowledgeable staff. The store’s prices are competitive, and we often run promotions and discounts on their products.
2. Oz Nails & Beauty Supply
 Oz Nails & Beauty Supply is another popular Nail beauty supply Adelaide store. They offer a comprehensive range of nail products and services, catering to both professional and amateur nail enthusiasts.
Gel nail paints, nail extensions, tools, and various other cosmetic aids such as eyelash extension kits and waxing equipment are just some of the items available at this shop. In addition, they provide education for those interested in working in the nail industry. Customers have spoken highly of Oz Nails & Beauty Supplies, praising the store’s helpful employees and excellent selection.
3. American Beauty Supply Australia
 Lastly, if you’re after the latest nail beauty trends and products, American Beauty Supply Australia has got you covered. They offer a wide range of nail products and services, catering to both professional and amateur nail enthusiasts. They also offer training courses for nail technicians.
They take pride in their reputation for impeccable service standards and being a trusted beauty supply brand for their valued customers. Moreover, American Beauty Supply Australia is the exclusive Master Importer of SNS nails in Australia since the beginning. They have carefully selected a range of coveted product lines from leading brands such as OPI, Apres, Caronlab, DND, Gelish, Poshe, and Urawa.
Conclusion
In conclusion, nail beauty supply Adelaide stores offer a vast range of products and services, catering to both professional and amateur nail enthusiasts.
Our top 3 picks, Amoca Nails Beauty Supply, Oz Nails & Beauty Supply, and American Beauty Supply Australia, offer a comprehensive range of products, excellent customer service, and competitive prices.
We encourage you to explore these and other nail beauty supply stores in Adelaide and experiment with new nail styles. With the right products and tools, you can create beautiful, unique nail looks that will make you feel confident and glamorous.
